Multi-region Air Hockey
Mulit-region hub-and-spoke architeture for Dockside Air Hockey
▸More posts (5)
In my
last blog
post I decribed the finalization and deployment of a browser based Air
Hockey game that I had initially started developing a few years back. I was
content with only deploying it to a Hetzner server in central europe, while
trying to bring on some real traffic via promoting it in /r/WebGames on
Reddit. Sensus data on the post told me that 450 people clicked on it. How many
actually signed up to play the game? One person! Someone did reach out to me
privetly though, and asked me to add my game to discovergg.com. So I did, and that got me two more users
(!).
Guest mode
This was my first learning: I needed to enable guest mode. I really didn't want to do this but apparently authenticating with Apple or Google is too much of a hurdle for most people. Guest mode allows them to start playing right away. I do not persist them in the database, which means that the games they play are not counted towards the ELO rating, and guests do not appear in the rankings/leaderboard. Instead I create an ephemeral token that can be used for 15 minutes. After that they are presented with a screen to sign up and reap the rewards, or to keep playing as a guest.
Multi region
I felt a little bad about the game only being available in EU. An American player would experience 150-200 ms latency, which I feel would make the game unplayable. Adding another server in US would be costly of course. But as I was committed to making a professional attempt at this game, I would have to pony up the cash I suppose. I ended up with a hub-and-spoke architecture.
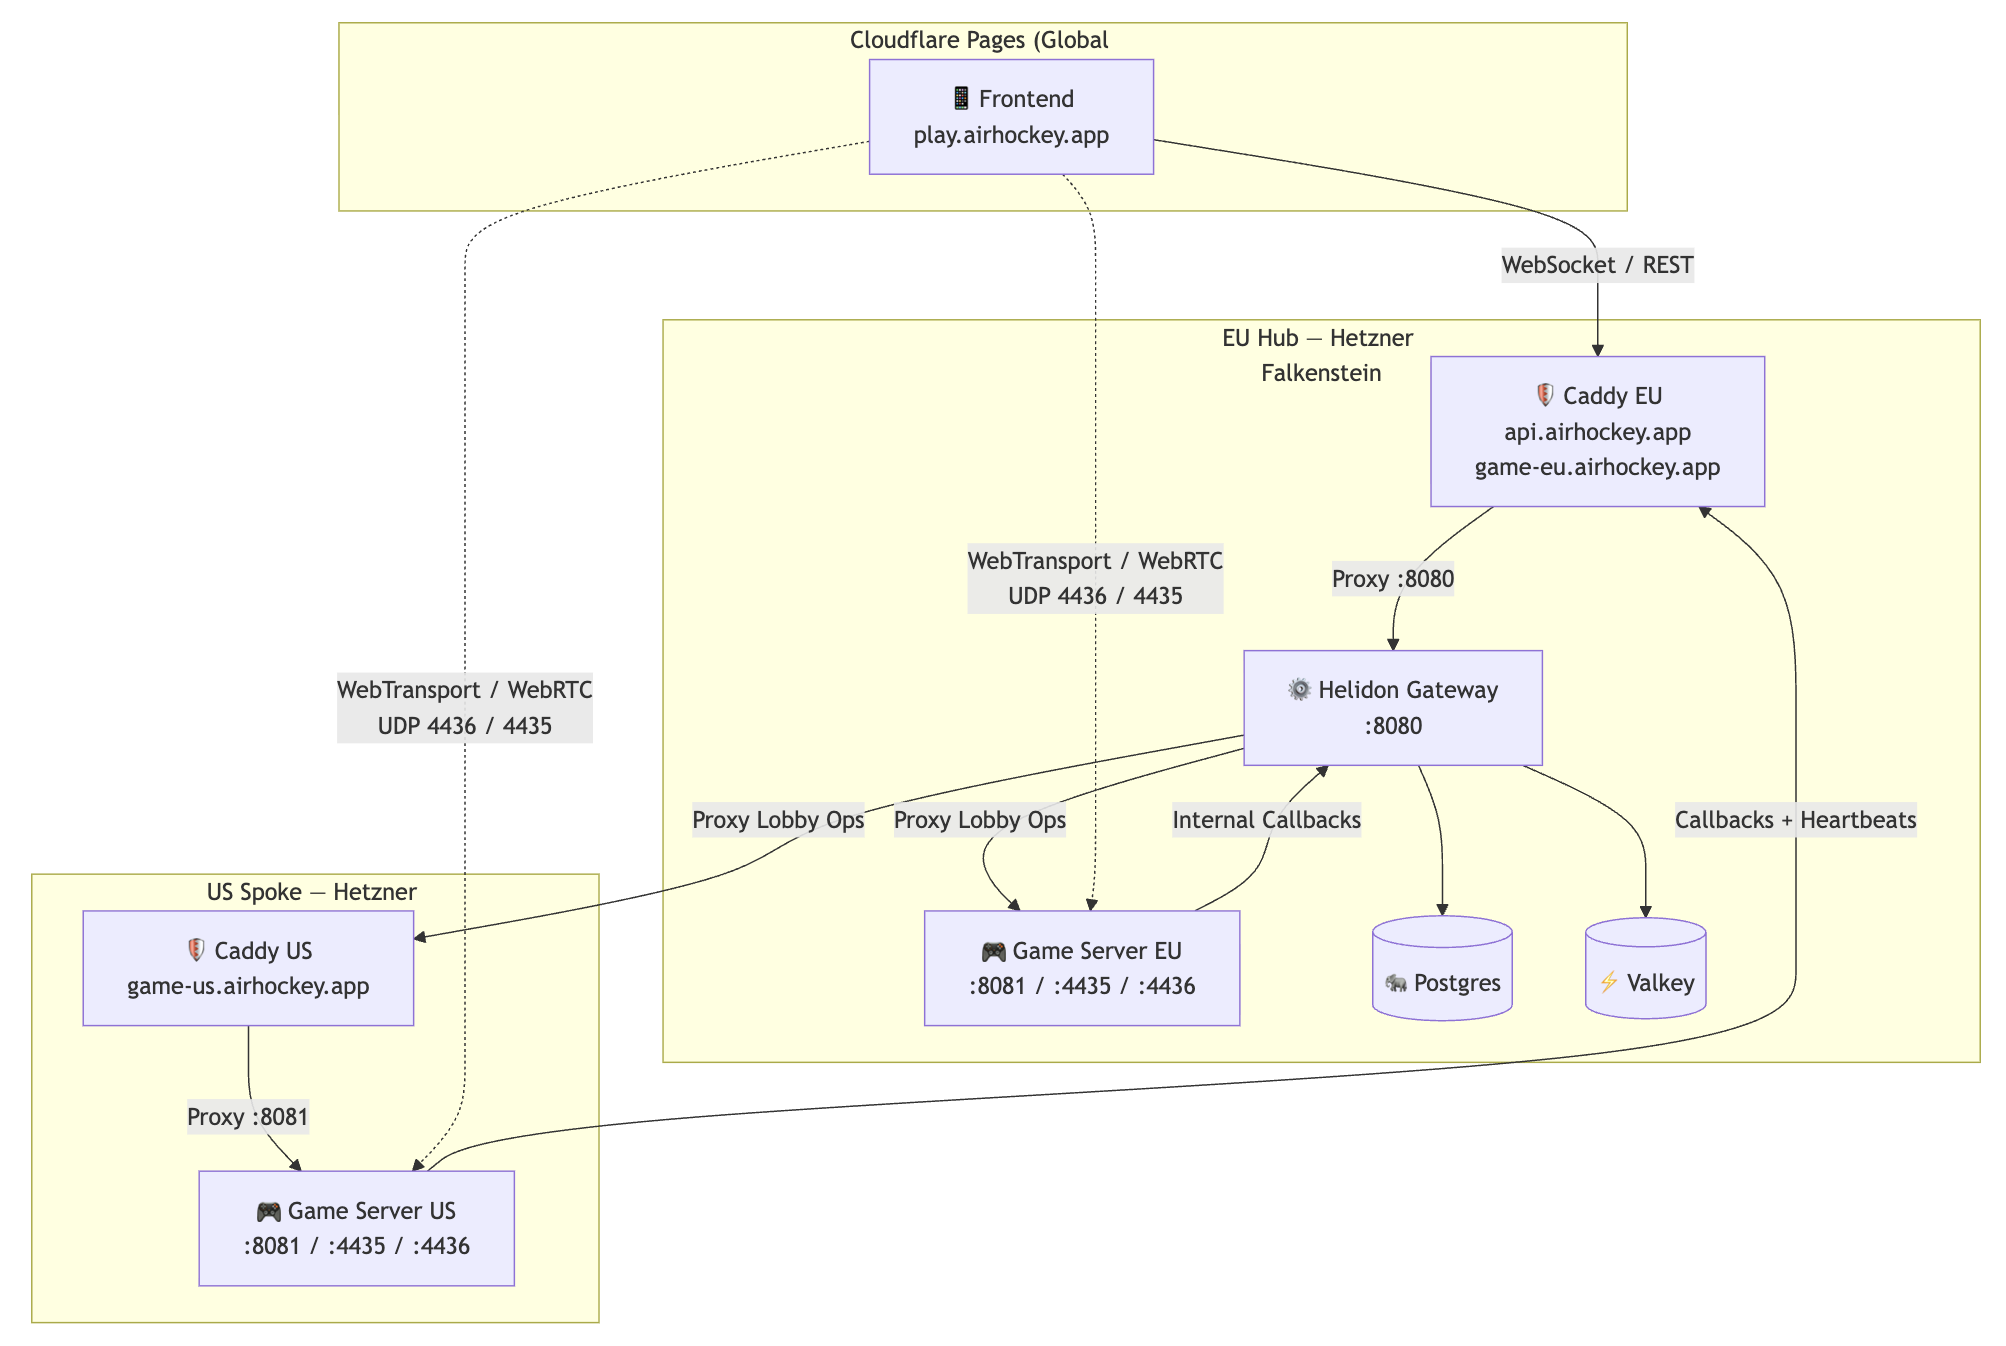
Hub
The Hub (EU Falkenstein) hosts the full stack: Caddy, Gateway, Postgres, Valkey, and one game server. All state (users, ELO, match history) lives here. The Gateway is the single authoritative entry point for REST, WebSocket, and inter-service communication.
Spoke
Spokes run only Caddy + a game server. They register with the Hub via heartbeat
(POST /api/servers/heartbeat) and push state changes via callbacks. Lobby
operations (join, leave, ready, add-ai) are proxied from the Gateway to the
spoke's game server via internal REST, authenticated with X-Service-Key. As
mentioned I only added one spoke: on a Hetzner server on the US east coast
(Ashburn). I picked a smaller server compared to the EU one since it only has to
run the game server: A Hetzner CPX11.
Region-scoped
When a user enters the site, a ping is made towards the two servers. Whichever one has the lowest latency becomes your home server. If you wish you can manually select the other one from a dropdown.
Creating a game on one server only makes it available to players that are connected to that server and vice versa. Same goes for the automatic match making. But high scores and rankings are global.
The custom observablity solution that I have going also collects data as scoped by machineId so that I can monitor which one has the most traffic and the user experience on each.
Stripe Integration
Finally, I made a Stripe integration to allow users to buy me a coffee if they enjoy the game. If they do, they get a shiny dimond next to their name in the leaderboard, a nice glowing supporter badge on their profile, and a pimped up player paddle in-game.